Utthita Hasta Padangusthasana (Extended Hand-to-Big-Toe Pose): How to Do It Step by Step

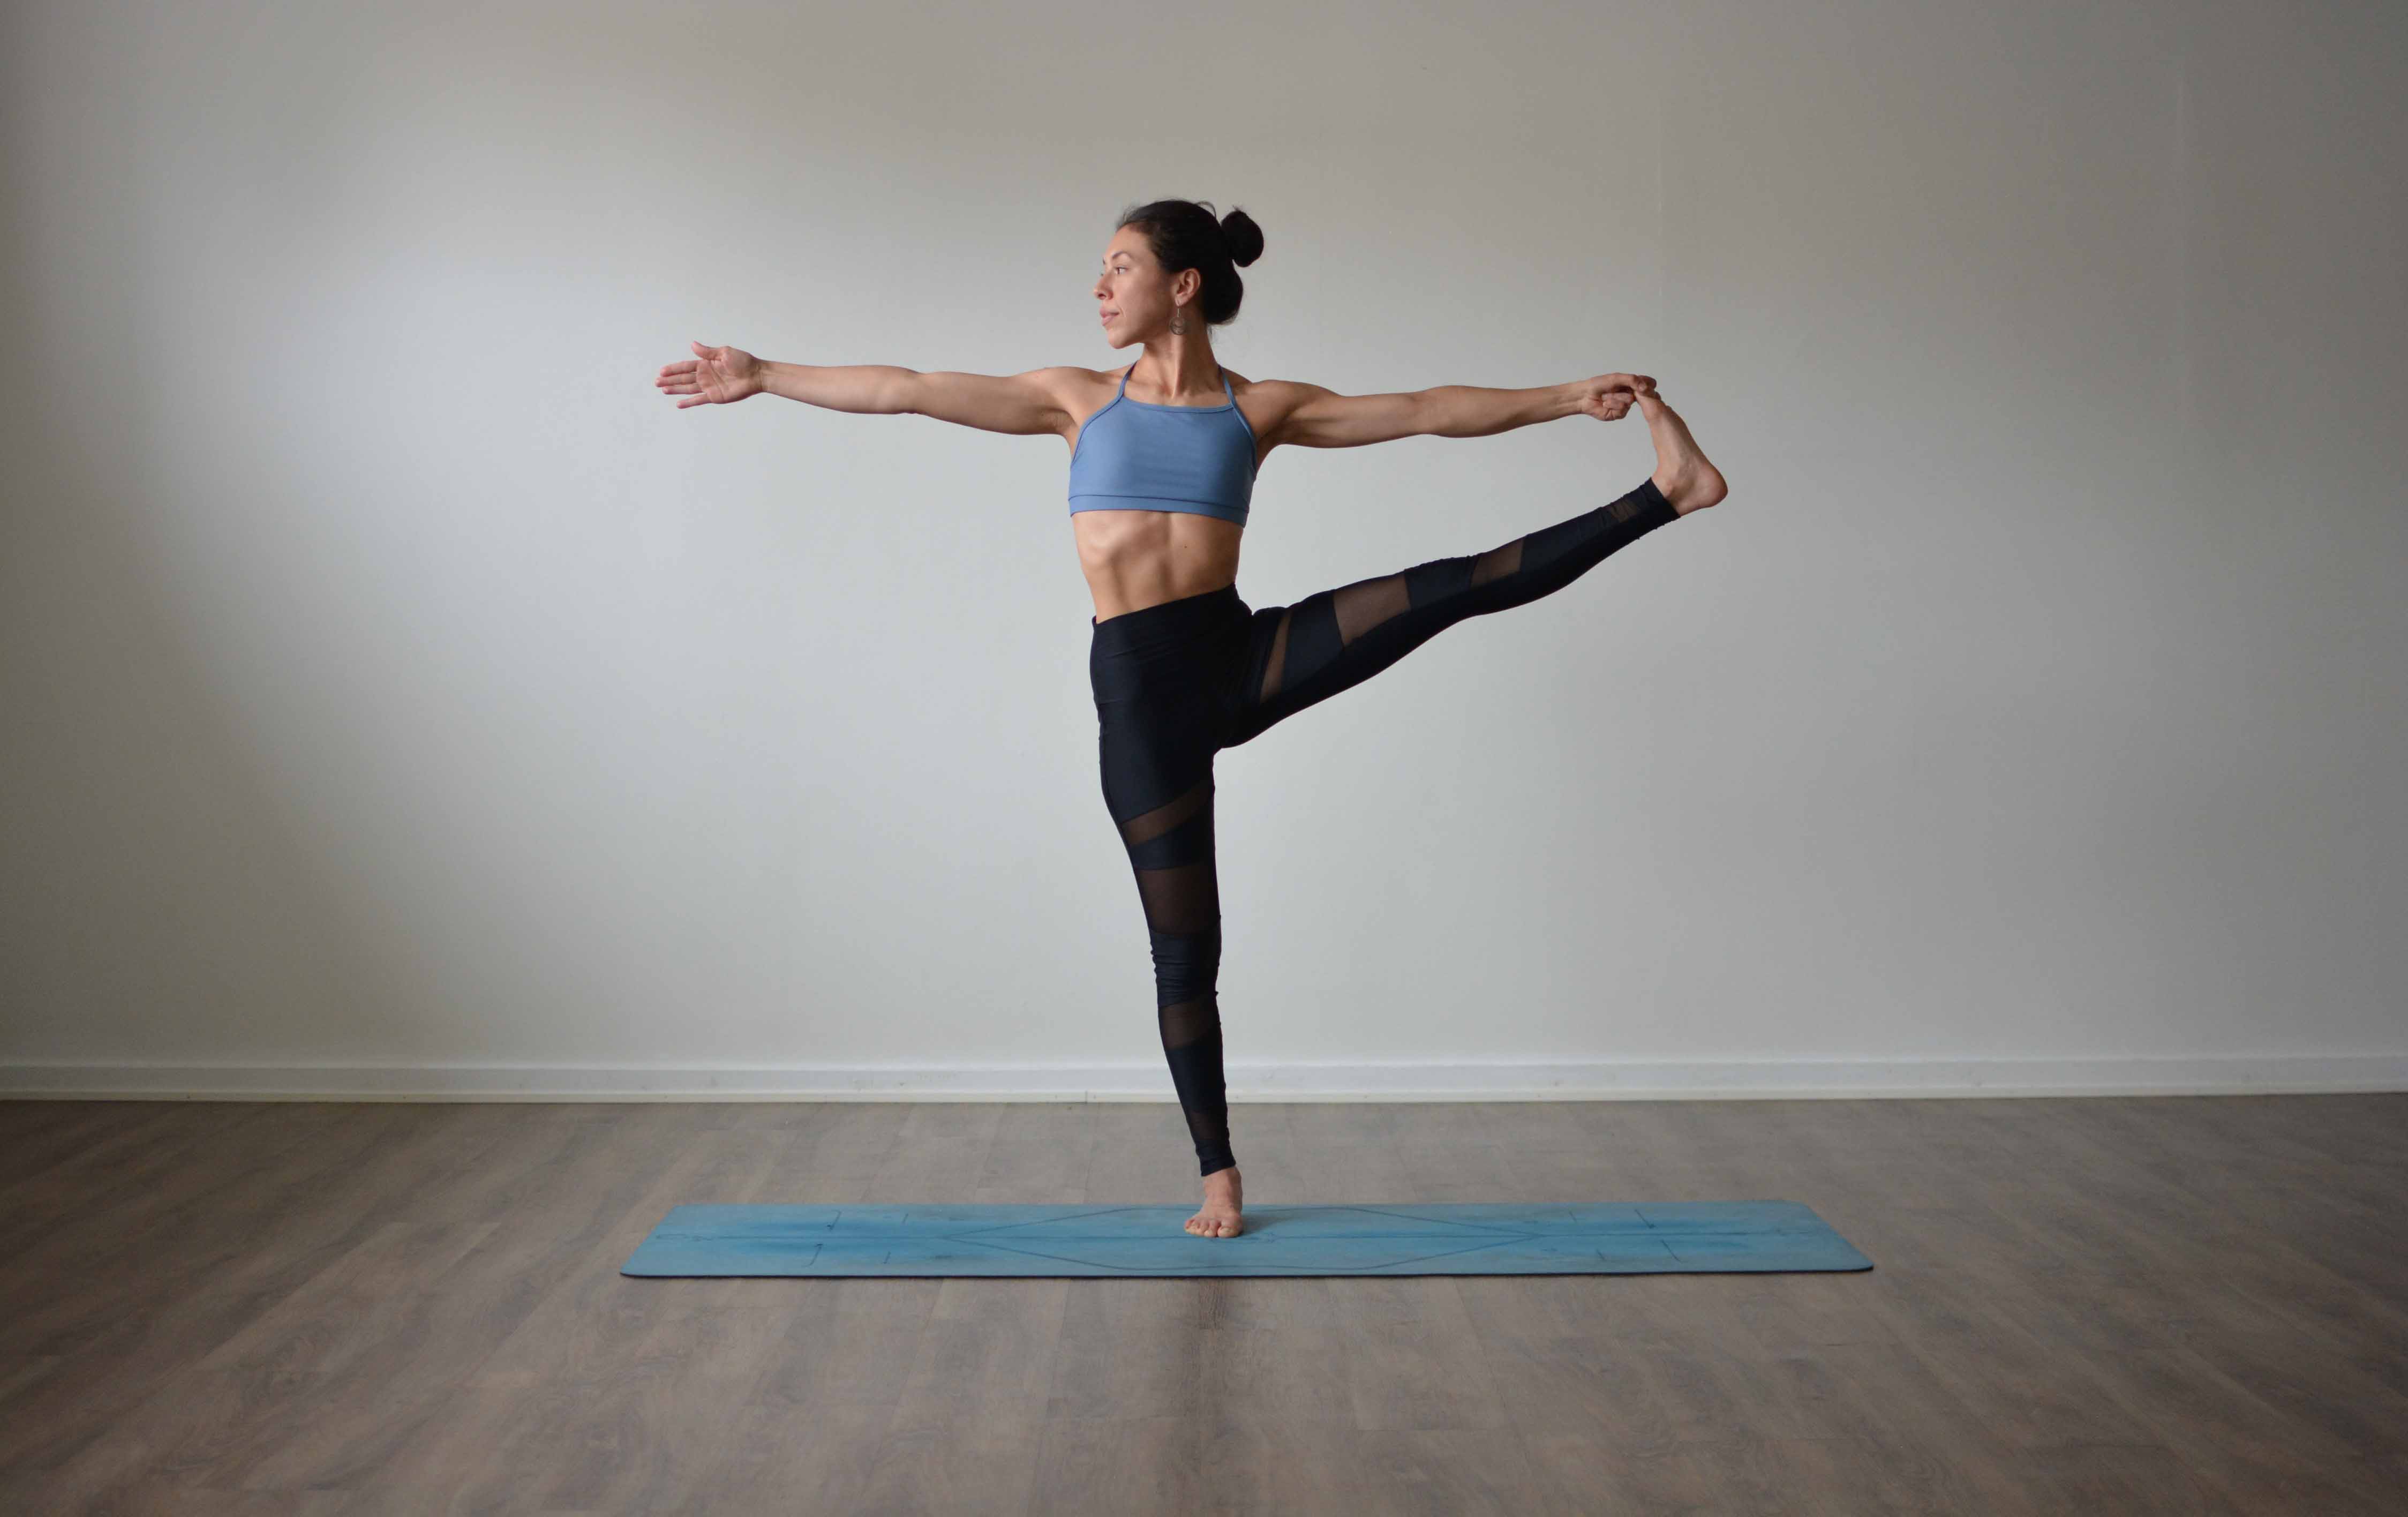
Utthita Hasta Padangusthasana (Extended Hand-to-Big-Toe Pose) is a standing balance in which you lift one leg, hold the big toe with your hand and straighten the leg, first forward and then out to the side. It stretches the hamstrings of the lifted leg while the standing leg, hip and core keep you upright. Most people start with a bent knee or a strap and a wall within reach.
Pose type: standing balance, hamstring stretch. Level: beginner with props, intermediate in the full form. Props: a strap, a wall or a chair.
What Utthita Hasta Padangusthasana means
The name is five Sanskrit words put together: utthita, extended, hasta, hand, pada, foot, angustha, big toe, and asana, posture. In English: the extended hand-to-big-toe pose. It is a close relative of Padangusthasana (Big Toe Pose), the standing forward fold where both hands hold both big toes.
You meet it in two traditions, taught in two ways. In Ashtanga it comes near the end of the standing sequence of the Primary Series, as one flowing unit: leg forward, leg to the side, leg held up without the hands. B.K.S. Iyengar's Light on Yoga (1966) describes it as two separate poses, forward and to the side, with the torso upright. Both are 20th-century forms. The pose does not appear in the medieval hatha texts.
How to do Utthita Hasta Padangusthasana, step by step
This is the forward and side version as most classes teach it. Stand near a wall the first few times.
- Stand in Tadasana (Mountain Pose) with your feet together or hip-width apart. Put your hands on your hips and press all four corners of the left foot into the floor.
- Firm the left thigh so the kneecap lifts. Keep a micro-bend if your knee tends to lock backward.
- Bring your right knee up toward your chest. Reach your right hand inside the thigh and hook the big toe with the first two fingers and the thumb. If the toe is out of reach, loop a strap around the ball of the foot instead.
- Stay here for a breath or two and check that you are steady. With a bent knee, this is already the pose.
- On an exhale, press the heel forward and straighten the right leg as far as it goes without the standing hip moving or the back rounding. Height does not matter. A level pelvis does.
- Keep the chest lifted and the shoulders down. Rest your gaze on one point in front of you. Hold for five breaths.
- On an inhale, open the right leg out to the side. The right hip wants to hike up and follow the leg: draw it down so both hips stay level. Turn your head to look over the left shoulder if your balance allows. Hold for five breaths.
- Bring the leg back to center, release the toe, lower the foot and stand in Tadasana. Feel the difference between the two legs for a breath, then repeat on the other side.
The Ashtanga sequence
In the Ashtanga Primary Series the pose has several parts, and teachers letter them differently. Leg forward, and on an exhale you fold the chest toward the shin. Come back up, take the leg to the side and gaze the other way. Bring the leg back to center and fold once more. Then let go and hold the leg in the air with both hands on your hips. Each position gets five breaths. The gaze rests on the toe when you fold forward and over the opposite shoulder in the side position, and the practice uses Mula Bandha, the root lock, throughout. Our guide to drishti, the yoga gaze, explains why a fixed point helps.
Benefits of Extended Hand-to-Big-Toe Pose
The pose does two jobs at once: a stretch for one leg and strength work for the other.
- Hamstrings and calf of the lifted leg: straightening the knee with the hip flexed lengthens the back of the thigh. In the side position the inner thigh (the adductors) stretches too.
- Standing leg and hip: the gluteus medius on the side of the standing hip works hard to keep the pelvis level, together with the quadriceps, the calf and the small muscles of the foot and ankle.
- Balance: standing on one leg while the other leg moves asks the ankle and hip for constant small corrections. Regular single-leg balance practice improves balance, and this is one of the harder versions.
Older versions of this post said the pose improves posture. One pose cannot promise that. What it gives you is stronger standing hips, more length in the back of the leg, and core work you feel as the trunk holds steady over one foot.
Who should skip or modify it
- Hamstring strain or high hamstring pain: skip the straight-leg version until it has settled. The bent-knee form, or the foot low on a chair, asks much less of the tendon near the sitting bone.
- Ankle, knee or hip injury on the standing side: use the wall, or practise lying down in Supta Padangusthasana (Reclining Hand-to-Big-Toe Pose), which gives the same stretch without the balance.
- Low back pain: keep the knee bent. Pulling a straight leg high with tight hamstrings rounds the lower back.
- Dizziness, low blood pressure or late pregnancy: practise next to a wall or a chair, and skip the head turn.
For more on practising without injury, read our 10 tips to avoid yoga injuries.
Common mistakes
- Chasing height. The leg goes up, the pelvis tucks under and the back rounds. Lower the leg and keep the spine long.
- Standing thigh drifting forward. Tight hamstrings pull the pelvis under, and the standing thigh pushes forward. Draw the top of the standing thigh back.
- Hiking the hip in the side position. The lifted hip rises toward the ribs. Let the leg come lower until both hips are level.
- Locked standing knee. Firm the thigh muscles, but keep the knee from pressing back into hyperextension.
- Holding the breath. A held breath makes the balance stiff. Breathe slowly through the nose.
- Refusing the strap. A strap with a straight spine teaches the pose better than a toe held with a rounded back.
Preparatory poses
- Vrksasana (Tree Pose): the first standing balance, same standing leg, lower demand.
- Padangusthasana (Big Toe Pose): the same toe grip and hamstring stretch with both feet on the floor.
- Prasarita Padottanasana (Wide-Legged Forward Bend): the inner thighs and hamstrings for the side position.
- Supta Padangusthasana (Reclining Hand-to-Big-Toe Pose): the same shape lying on your back, where the floor keeps the pelvis level.
Our article on hamstrings and yoga explains why the back of the leg is slow to lengthen and how to stretch it without straining it.
Follow-up poses
- Dandayamana Janushirasana (Standing Head-to-Knee Pose): a deeper forward fold over the lifted leg.
- Ardha Chandrasana (Half Moon Pose): the same side-hip strength with the body turned open.
- Virabhadrasana III (Warrior III): a one-legged balance with the leg lifted behind you.
- Adho Mukha Svanasana (Downward-Facing Dog): lengthens both legs evenly after the one-sided work.
Variations
- Bent knee: hold the toe or the knee and keep the leg bent. The balance stays, the hamstring demand drops.
- With a strap: loop the strap around the ball of the foot and straighten the leg as far as the spine allows.
- Foot on a wall or chair: rest the heel on a wall, a windowsill or the padded back of a chair at hip height or lower. You can stay longer and let the stretch build.
- Hands free: the last part of the Ashtanga sequence. Let go of the toe and hold the leg up with the hands on the hips. The front of the hip and the thigh of the lifted leg do the work.
- Forward fold: in the forward position, fold the chest toward the shin. Only once the leg is straight and the spine stays long.
To practise the pose in its place in the sequence, follow the Complete All the Standing Postures class, or start from the beginning with the Ashtanga Fundamentals program and our other Ashtanga yoga classes.
Frequently asked questions
What is the meaning of Utthita Hasta Padangusthasana?
It means extended hand-to-big-toe pose. Utthita is extended, hasta is hand, pada is foot, angustha is big toe and asana is posture. The name describes the shape: you hold the big toe with your hand and extend the leg.
What are the benefits of Utthita Hasta Padangusthasana?
It stretches the hamstrings and calf of the lifted leg, and the inner thigh in the side position. The standing leg and the side of the standing hip work to keep you level and upright, which trains single-leg balance.
Is Extended Hand-to-Big-Toe Pose good for beginners?
The full pose with a straight leg is intermediate. Beginners can do it with a bent knee, a strap around the foot and a hand on a wall. That version gives the same balance work without forcing the hamstrings.
What if I can't reach my big toe?
Use a strap around the ball of the foot, or hold the knee and keep the leg bent. Reaching the toe with a rounded back does less for you than a strap with a long spine.
Why do I lose my balance in this pose?
Usually because the standing hip sinks or the pelvis tucks as the leg rises. Firm the standing thigh, keep the hips level, fix your gaze on one point and breathe slowly. Lowering the lifted leg a little often solves it.
What are Utthita Hasta Padangusthasana A, B, C and D?
In Ashtanga the pose is taught as a series of positions: leg forward with a fold, leg to the side, leg back to center with a second fold, and leg held up without the hands. Teachers and books letter these parts differently, so ask your teacher what each letter means in their class.