Eka Pada Rajakapotasana (One-Legged King Pigeon Pose): How to Do It Step by Step

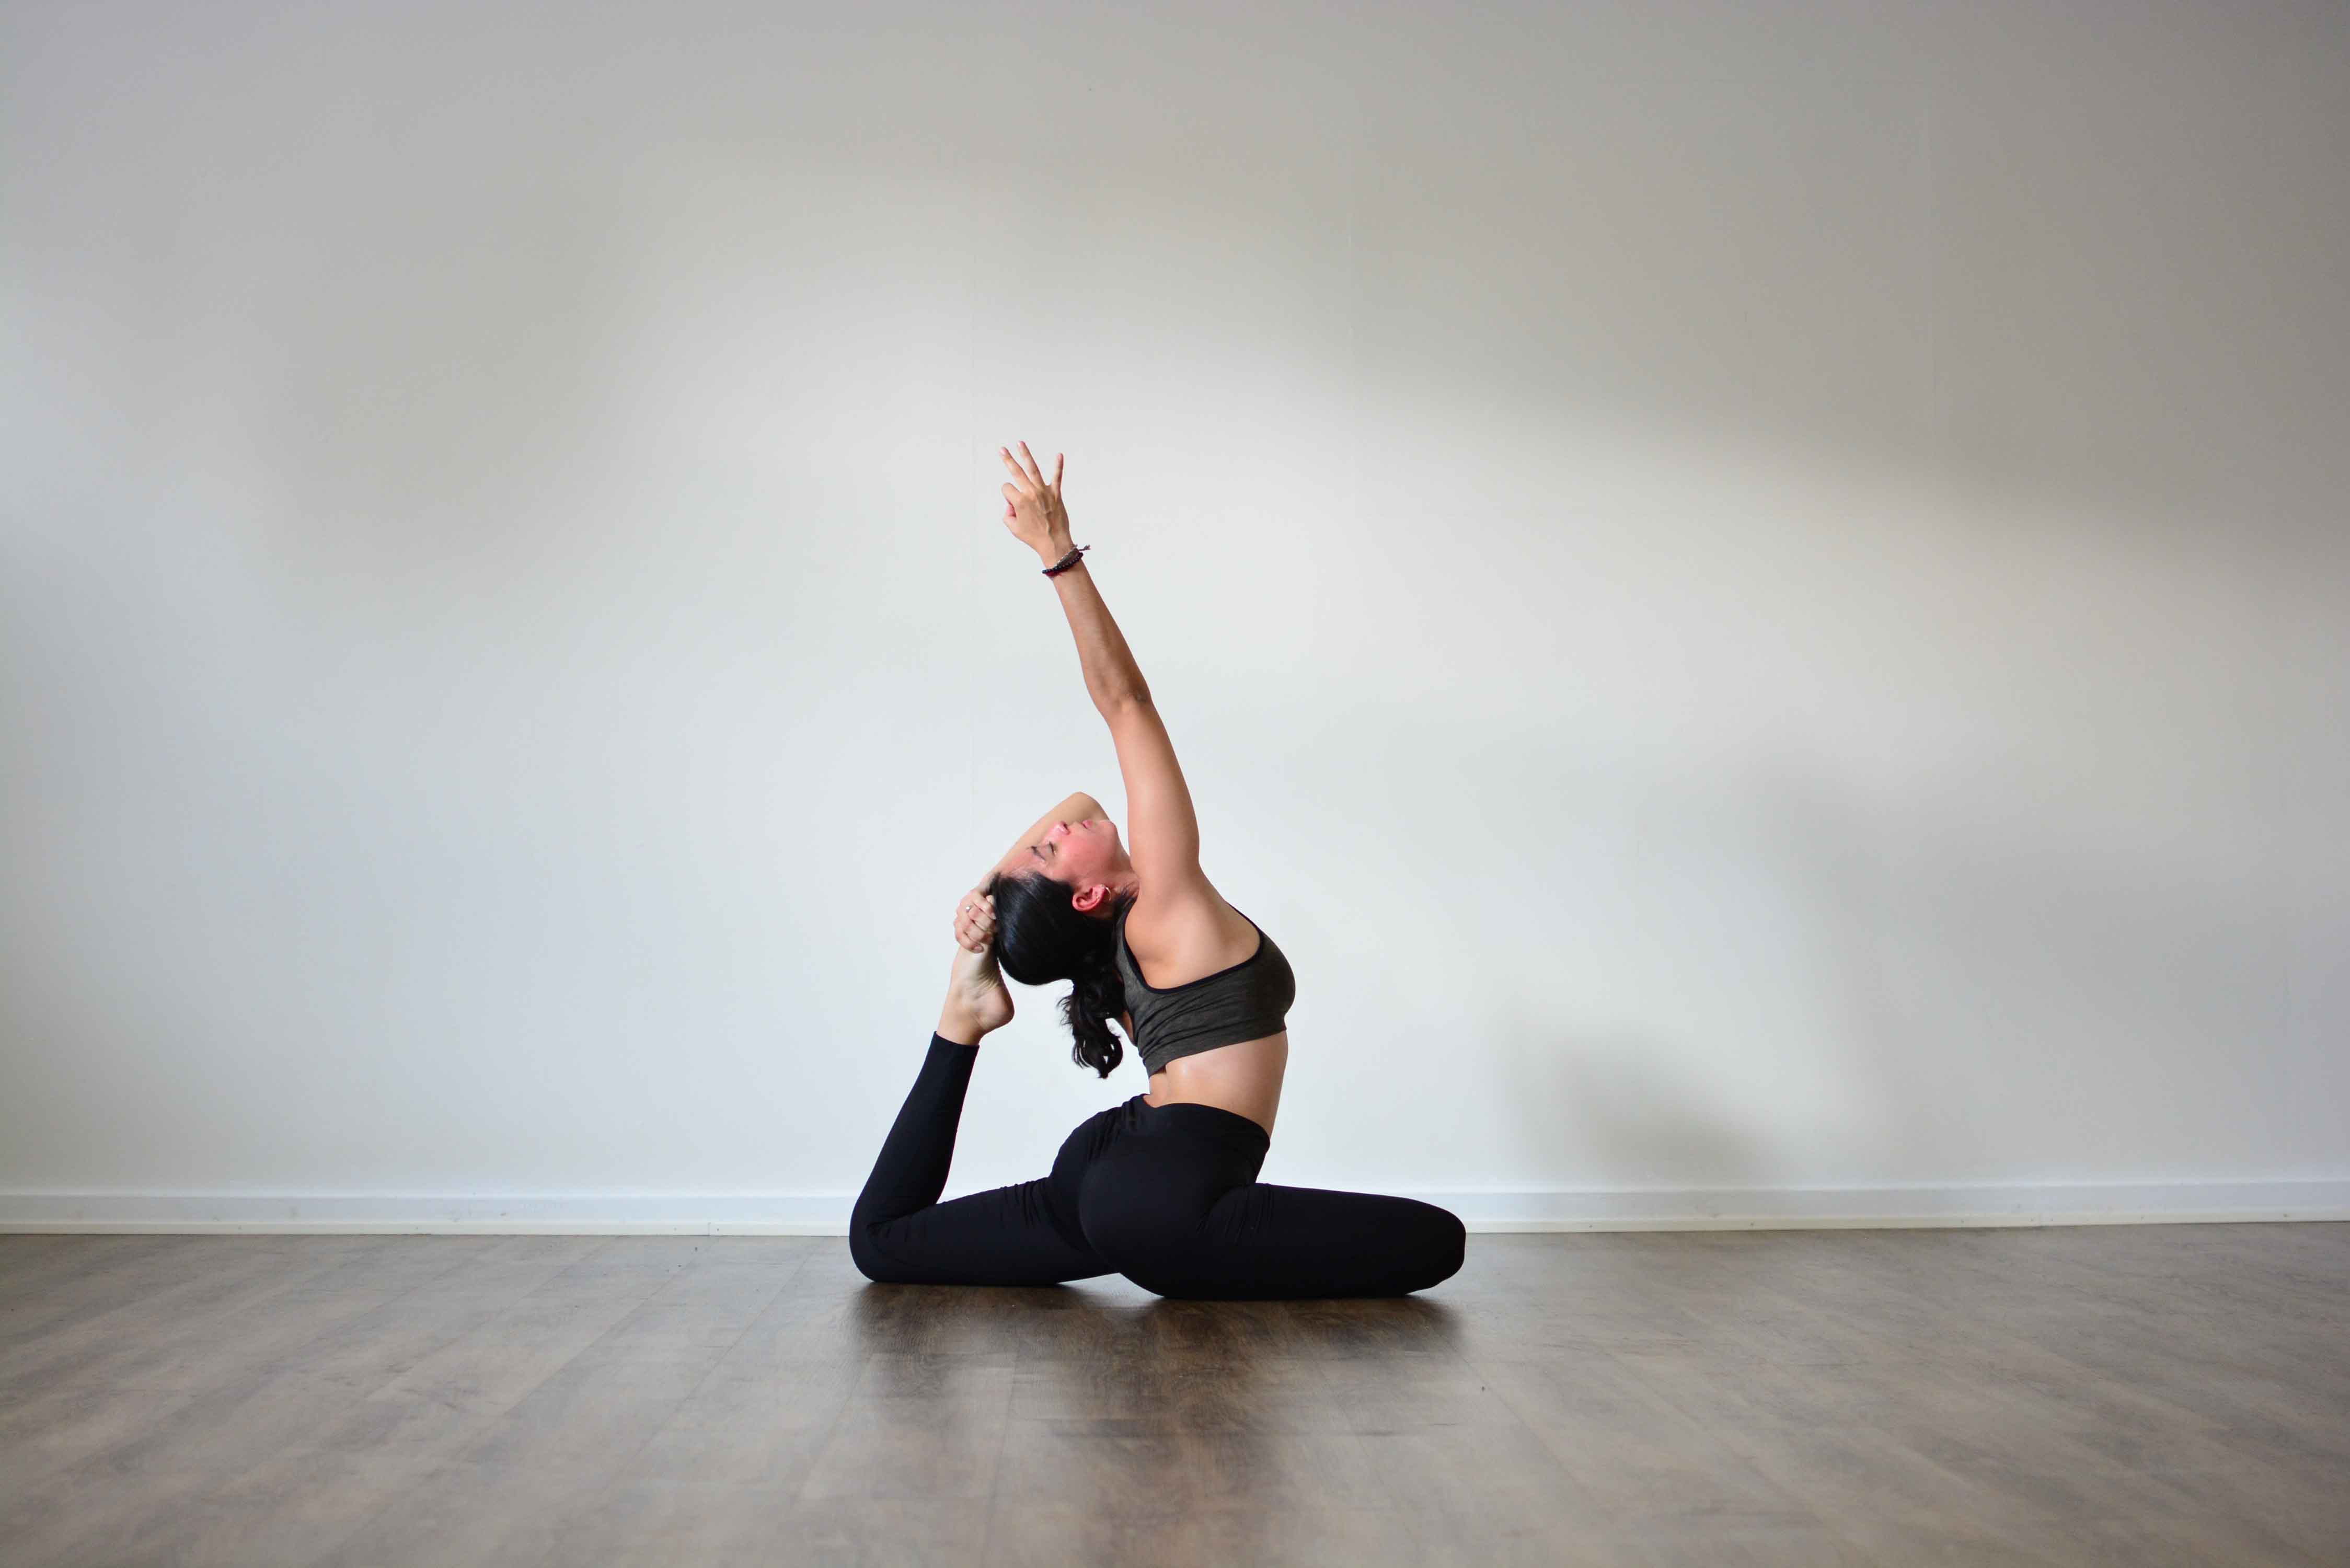
Eka Pada Rajakapotasana (One-Legged King Pigeon Pose) is an advanced backbend and hip opener. The front leg is folded on the floor, the back knee bends, and both hands reach overhead to hold the back foot, which draws toward the back of the head. It asks for three things at once: outward rotation in the front hip, a long front thigh and hip flexor on the back leg, and a deep bend through the upper back and shoulders.
Pose type: backbend, hip opener, kneeling. Level: advanced. Props: a strap, a folded blanket or a block under the front hip.
What Eka Pada Rajakapotasana means
The name breaks into five Sanskrit words: eka, one; pada, foot or leg; raja, king; kapota, pigeon; and asana, pose. With the chest lifted and pushed forward, the body takes the shape of a pigeon puffing out its breast. The "one-legged" part refers to the single leg that reaches back toward the head.
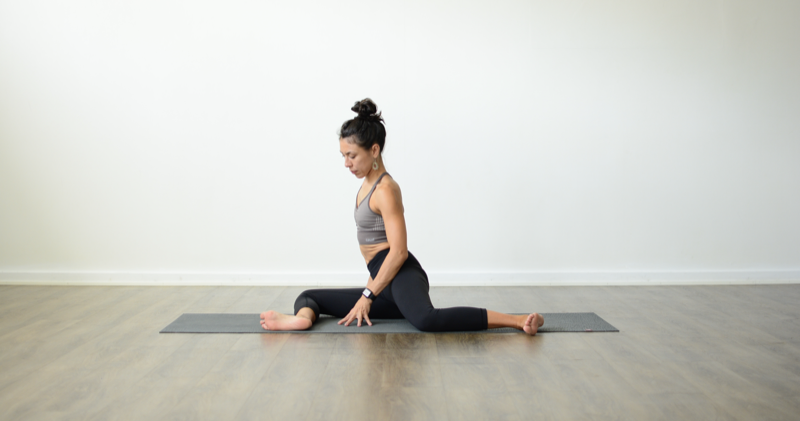
Most people know the pose from its simpler cousin. What studios call Pigeon Pose, or Half Pigeon, is the base of this pose without the backbend: front shin on the floor, back leg long, often with the torso folded forward over the front leg.
How to do Eka Pada Rajakapotasana, step by step
Warm up first. Hips, front thighs and shoulders all need to be open before you try this, so place it late in a practice, after lunges and a few smaller backbends.
- Start on all fours, knees under hips and hands a little ahead of the shoulders.
- Slide your right knee forward until it sits behind your right wrist. Let the right shin angle across the mat, with the right foot somewhere in front of the left knee. The outside of the right shin rests on the floor.
- Slide the left leg back and straighten it until the front of the thigh rests on the floor. Check that it extends straight back from the hip and does not angle out to the side.
- Lower the right buttock toward the floor. If it stays high, put a folded blanket or a block under it. Both hip points should face forward, so roll the left hip slightly toward the right heel.
- Bring your fingertips to the floor beside the front shin and lift your torso. Lengthen your lower back by drawing the tailbone down, and lift the lower ribs, then the upper ribs, so the chest opens toward the ceiling. Stay here for a few breaths if this is already a strong stretch. You are in the base pose.
- Bend the left knee so the foot points up. Reach back with the left hand and take hold of the foot, or loop a strap around it.
- Turn the elbow up toward the ceiling so the hand holds the foot from above. Then reach the right arm overhead and take the foot, or the strap, with both hands.
- Lift the chest, draw the elbows in toward each other and let the head move back toward the foot without squeezing the back of the neck. Breathe for 3 to 5 slow breaths.
- To come out, release the foot one hand at a time, lower the back knee, return to all fours and repeat with the left leg forward.
The grip is the hard part. Reaching back with the palm facing down and then rotating the elbow up takes shoulder mobility that most people build over months. A strap lets you practise the shape of the arms long before your hands meet the foot.
Benefits of King Pigeon Pose
Mostly, the pose stretches. It works the front of the body from the knee of the back leg to the throat, and the outer hip of the front leg.
- Front hip: the folded front leg takes the hip into outward rotation and stretches the glutes and the deep rotators around the joint.
- Back leg: the long back leg with a bent knee stretches the quadriceps and the hip flexors, including the psoas.
- Spine and shoulders: the overhead grip bends the upper back and stretches the chest, the shoulders and the latissimus dorsi along the sides of the back.
To hold the backbend, the muscles along the spine and the glutes have to work, so the pose builds some strength as well. Older descriptions, including our own earlier version of this post, said the pose stimulates the abdominal organs and releases stress stored in the hips. There is no good evidence for either, so we leave them out.
Who should skip or modify the pose
King Pigeon loads the knee, the lower back and the shoulder at the same time, so the list is longer than for most poses.
- Knee problems: if the front hip does not rotate far enough, the twist goes into the front knee. Skip the front-leg fold if you have a meniscus or ligament injury, or stretch the hip lying on your back instead, with one ankle crossed over the opposite knee.
- Lower back pain: a deep backbend with a tight front thigh tends to fold at the lower back. Stay in the upright base pose with the back leg long.
- Shoulder injuries: the overhead grip is hard on the rotator cuff. Keep one hand on the floor, or leave the back foot alone.
- Sacroiliac joint pain: the uneven position of the pelvis can irritate it. Support the front hip well with a blanket, or choose a Low Lunge.
- Pregnancy: leave out the deep backbend. Many people find the base pose with good support under the front hip comfortable. Ask your midwife or doctor.
Sharp pain in the knee or pinching in the lower back means come out. A strong stretch in the outer hip and the front of the thigh is what you want. For more on this, read our 10 tips to avoid yoga injuries.
Common mistakes
- Hanging on the front hip. When the front buttock stays in the air and you let your weight drop onto it anyway, the knee takes the strain. Put support under the hip.
- Back leg angled out. The back thigh should point straight back. When it swings out, the pelvis twists and the stretch leaves the hip flexor.
- Bending only in the lower back. Lift the chest first, then bend. The upper back should do most of the work.
- Pulling the foot with force. Yanking the foot toward the head strains the knee of the back leg. Hold it and let the chest come to it.
- Elbows flaring out. Wide elbows collapse the shoulders. Draw them toward each other.
- Holding the breath. If you cannot breathe slowly, you have gone too far.
Preparatory poses
Prepare the three areas the pose asks for: the front hip, the front thigh of the back leg, and the upper back and shoulders.
- Anjaneyasana (Low Lunge): opens the hip flexors of the back leg, and with the back knee bent it becomes a quad stretch.
- Gomukhasana (Cow Face Pose): the outer hips, and the arms for the overhead grip.
- Baddha Konasana (Bound Angle Pose): outward rotation in both hips.
- Supta Vajrasana (Fixed Firm Pose): a reclined stretch for the front of the thighs.
- Bhujangasana (Cobra Pose) and Setu Bandha Sarvangasana (Bridge Pose): gentle backbends that teach the chest to lift before the lower back bends.
Our guides to the hip flexors and the psoas and to the quadriceps explain what is being stretched in the back leg.
Follow-up poses
- Ustrasana (Camel Pose) and Dhanurasana (Bow Pose): backbends that use the same stretch through the front of the body, with both legs working together.
- Urdhva Dhanurasana (Wheel Pose): the next step once the upper back and shoulders open.
- Balasana (Child's Pose) or a forward fold in the base pose, to let the lower back rest after the bend.
Eka Pada Rajakapotasana variations
B.K.S. Iyengar's Light on Yoga (1966) describes four versions of the pose. The back leg and the grip stay about the same. What changes is the front leg.
- Eka Pada Rajakapotasana I: the front shin folded on the floor, as described above.
- Eka Pada Rajakapotasana II: the front foot stands on the floor with the knee bent over it, as in a lunge.
- Eka Pada Rajakapotasana III: the front leg folds back beside the hip, as in Virasana (Hero Pose).
- Eka Pada Rajakapotasana IV: the front leg is straight on the floor, as in the front splits.
Easier versions for everyday practice:
- Half Pigeon, upright: the base pose with both hands on the floor and the chest lifted.
- Sleeping Pigeon: the same base with the torso folded forward over the front leg, forearms or forehead on the floor. A long hold for the outer hip.
- Mermaid: the back foot hooked in the elbow on the same side, the hands clasped. A step toward the full grip.
- With a strap: the strap around the back foot, both hands on the strap overhead.
Where teachers disagree
The front shin. Many classes cue the front shin parallel to the front edge of the mat. That asks for a lot of outward rotation, and for many bodies it pushes the twist into the knee. Others teach the front heel close to the opposite hip, which is kinder to the knee. The shape of the hip socket and the thigh bone differs from person to person, so the right angle is the one where you feel the stretch in the hip and not in the knee.
The chakra link. Some teachers link the pose to Svadhisthana, the sacral chakra, and to the idea that hips hold emotion. That is a belief from the yoga tradition and from modern studio culture, and anatomy cannot show it. If it interests you, our beginner's guide to the seven chakras explains the system.
How old the pose is. King Pigeon is not in the Hatha Yoga Pradipika or the other medieval hatha texts. Its best known early description is in Light on Yoga, and it belongs to the modern posture practice that grew from Krishnamacharya's lineage.
Lauren Matters' class King of the Pigeons works toward the full pose with a strap, level 2-3. For a gentler start, 20-Minute Pigeon builds the hip side of it at level 1-2.
Frequently asked questions
What are the benefits of Eka Pada Rajakapotasana?
It stretches the outer hip of the front leg, the quadriceps and hip flexors of the back leg, and the chest, shoulders and upper back. Holding the backbend also works the muscles along the spine and the glutes. Claims about organs and stored stress are not backed by research.
Why is King Pigeon so hard?
Because it needs three kinds of mobility at the same time: outward rotation in the front hip, length in the front of the back thigh, and a deep bend in the upper back with the arms overhead. Most people have one or two of them. The overhead grip on the foot is usually the last piece to arrive.
What is the difference between Pigeon Pose and King Pigeon Pose?
Pigeon Pose, or Half Pigeon, is the base: front shin on the floor and the back leg long, either upright or folded forward. King Pigeon adds the backbend, with the back knee bent and both hands holding the back foot overhead.
Who should avoid King Pigeon Pose?
Skip the full pose if you have a knee, lower back, shoulder or sacroiliac injury, and leave out the deep backbend when pregnant. The base pose with a blanket under the front hip, or a Low Lunge, are safer ways to stretch the same areas.
How long should you hold King Pigeon?
Three to five slow breaths on each side is enough for the full pose. The upright base can be held for a minute, and the forward-folded Sleeping Pigeon for two to five minutes, as in Yin Yoga.
Which is the hardest yoga pose?
There is no agreed answer. Lists of the hardest poses usually include deep backbends such as Kapotasana and the full King Pigeon, arm balances such as Eka Pada Koundinyasana, and long holds in Handstand. Which one is hardest depends on whether your body leans more toward flexibility or strength.