Yoga Injuries: 10 Tips to Practise Asana Safely


Yoga injuries are uncommon, and most of them are strains and sprains rather than serious damage. They tend to happen in the same places: the lower back, shoulders, wrists, knees, hamstrings and neck. The usual causes are forcing range you do not have yet, loading a joint that is not warmed up or not strong enough, and holding a pose through pain instead of backing off.
This guide goes through where yoga injuries happen, what causes each one, and the 10 habits that keep your practice safe. It is written for students. If you already have pain that does not settle, see a doctor or physiotherapist before you work around it on the mat.
How common are yoga injuries?
Less common than in most sports, but they happen. A study of US emergency departments (Swain and McGwin, 2016) estimated around 29,000 yoga-related injuries between 2001 and 2014. Close to half were to the trunk, most of them sprains and strains, and the injury rate rose fastest among students over 65. Reviews of clinical yoga trials have found injuries at about the same rate as in other forms of exercise.
Two things follow from that. Yoga is a reasonably safe way to move. And the risk is real enough that it pays to know where it sits.
The most common yoga injuries and how to prevent them
Lower back
Lower back pain is the complaint teachers hear most. It often comes from forward folds and Downward-Facing Dog (Adho Mukha Svanasana) done with tight hamstrings: the back of the legs will not let the pelvis tip forward, so the lower spine rounds to make up the difference. Deep backbends taken from the lower back alone are the other usual cause.
Prevention: fold from the hips. Send your hips back, bend your knees as much as you need, and let your belly come toward your thighs before your head goes toward the floor. In seated forward folds, sit on a folded blanket or a block so your pelvis can tilt forward. In backbends, lengthen first and spread the bend through the upper back as well.
Shoulders
Shoulder pain in yoga usually comes from bearing weight on the arms before the muscles around the shoulder blade can hold the joint steady. Repeated Chaturanga Dandasana in a fast flow, with the chest dropping below the elbows, is the classic example. Tight chest muscles that pull the shoulders forward make it worse.
Prevention: open the front and strengthen the back. Lie with a rolled mat under your upper back, across the spine at the level of the shoulder blades, and take your arms overhead only as far as they go without pain. Lie face down and lift your chest and arms, reaching the hands toward your feet. Add scapula push-ups: on all fours, let your shoulder blades draw together as the chest sinks, then push the floor away until they spread apart. Three sets of 10 is a good start. Our guide to the scapula in yoga explains the muscles involved.
Wrists
Plank, Chaturanga, Crow Pose, handstand and side plank all put your body weight on the wrists, a joint most of us never load that way in daily life. Too much, too soon, gives sore wrists.
Prevention: warm up the wrists before you bear weight and add load gradually. Then work on the hands themselves:
- Spread your fingers and press through the whole hand, especially the base of the index finger.
- Keep the palms flat. Do not cup them or turn the fingers inward.
- Keep your shoulders over or slightly behind your wrists in plank, not far forward of them.
- If your wrists complain, put a folded mat or a wedge under the heels of your hands to reduce the angle.
The 10-minute wrist mobility class is a good warm-up before an arm balance session.
Knees
The knee is a hinge. It bends and straightens, and it has little room to twist. Most knee trouble in yoga comes from asking it to twist because the hip will not rotate enough. Lotus Pose is the best-known case: case reports describe meniscus tears in people who forced their way into it.
Prevention:
- In lunges and warrior poses, keep the front knee over the ankle, pointing the same way as the middle toes.
- In standing poses, keep a soft bend in the knee rather than locking it back, especially if your knees hyperextend.
- For Padmasana (Lotus Pose), turn the leg out from the hip and never pull the foot into place with the knee. If the knee hurts, sit higher and use Half Lotus or Sukhasana (Easy Pose) instead.
- In Pigeon and its reclined version, flex the foot and spread the toes. It keeps the ankle stable and takes strain off the knee.
Hamstrings
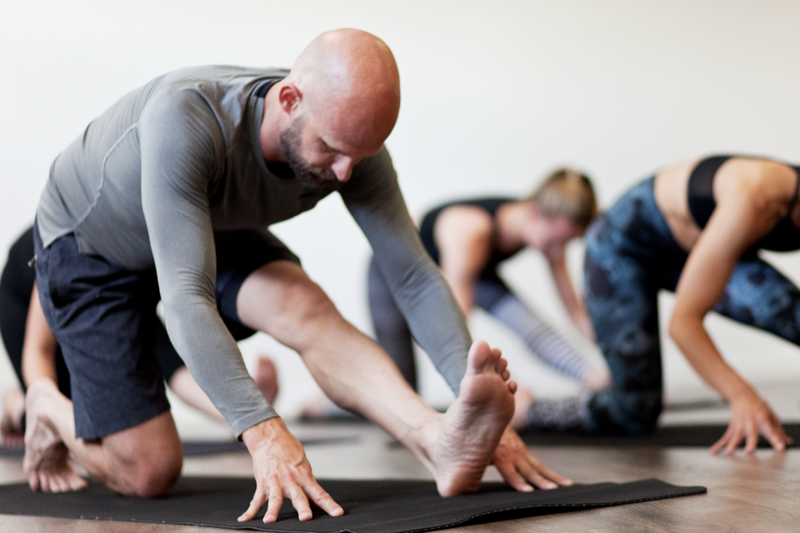
Hamstring injuries in yoga tend to show up as a deep ache where the muscle attaches to the sitting bone. It comes on slowly, often in flexible students who push their forward folds day after day. Hamstrings also change from day to day: heels on the floor in Down Dog yesterday is no promise for today.
Prevention: stretch with a bend in the knees on stiff days, stop short of the end of your range in repeated folds, and strengthen the hamstrings as well as stretching them. Bridge Pose and Locust Pose both work the back of the legs. Read more in hamstrings and yoga.
Hips and groin
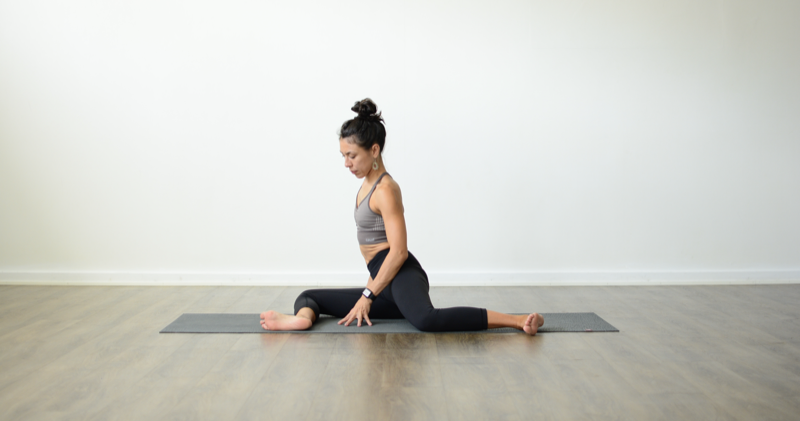
Splits, wide-legged forward folds and deep lunges can take the inner thigh past what it can control. The result can be a strain in the adductors, the muscles along the inner thigh and groin.
Prevention: build strength in the range you are stretching into. Strong glutes, hip flexors and inner thighs keep the pelvis stable while you open. Use blocks under your hands in splits so you can control how far you go. Our guide to the glutes in yoga has poses that build that support.
Ribs and the side body
Twists can strain the intercostal muscles between the ribs when you crank yourself deeper with your arms.
Prevention: lengthen your spine on the inhale, turn on the exhale, and stop where you feel a stretch. Use your arms to hold the twist, not to force it. See yoga twists and how to twist safely.
Neck
Neck injuries are rare in yoga, but they are the ones to take most seriously. The risk sits in poses that put body weight on the head or neck: Sirsasana (Headstand), Salamba Sarvangasana (Shoulderstand) and Halasana (Plow Pose), and resting on the crown of the head on the way into Wheel Pose. Dropping the head back hard in Camel or Upward-Facing Dog adds strain too.
Prevention: learn inversions from a teacher, one step at a time. In headstand, carry most of the weight through the forearms and shoulders, with the head only lightly on the floor. In shoulderstand, a stack of folded blankets under the shoulders (head off the blankets) keeps the neck from flattening against the floor. In backbends, lead with the chest and let the head follow last.
Elbows
Lowering into Chaturanga with the elbows flaring out to the sides loads the elbow joint from an angle it does not like.
Prevention: keep the elbows close to your ribs as you bend, with the elbow creases facing forward. Lower only as far as you can control. Knees on the floor is a full version of the pose.
10 tips for a safe yoga practice
- Warm up first. Warm muscles move further with less strain. A few rounds of Surya Namaskar A (Sun Salutation A) before deeper poses is enough.
- Build from the ground up. Set your feet or hands first, then the rest of the pose. A stable base makes the alignment above it easier.
- Use your breath as a gauge. If you cannot breathe slowly and evenly, or you start to gasp through the mouth, back off. That is a sign you are working harder than you can control.
- Tell stretch from pain. A stretch is a dull pull in the belly of a muscle. Sharp, pinching or burning pain, pain in a joint, or pain that stays after you come out means stop.
- Stop when you shake and lose form. A little trembling is work. Shaking so much you lose the pose, or a limb that feels clumsy or numb, means come out.
- Find your own alignment. Bodies differ in bone shape and joint range. A cue that suits one student can strain another. Adapt the pose to your body, not the other way around.
- Use props. A block, a strap or a blanket brings the floor closer and lets you keep the shape of the pose without forcing it. Using them is good technique, whatever your level.
- Strengthen as well as stretch. Many yoga injuries happen at the end of a range the muscles cannot hold. Strength gives flexibility something to stand on. See why yogis need strength training.
- Progress slowly. Add one harder pose or a few more minutes at a time. Tendons adapt more slowly than muscles, so feeling fine today does not mean you are ready for more tomorrow.
- Learn from a teacher. A good teacher sees what you cannot feel. Tell them about injuries before class. If you practise online, start with a beginner program rather than advanced flows.
Where teachers and research disagree
Yoga safety advice is not all settled, and some of it is repeated more confidently than the evidence allows.
- Rounding the spine. Many teachers treat a rounded back in forward folds as the main cause of back injury. Spine researchers disagree about how harmful flexion is. The spine bends by nature, and a body used to rounding usually tolerates it. The risk grows when you round under heavy load, suddenly or far beyond what you are used to. Folding from the hips is a sensible default. A rounded spine in a forward fold is not an injury waiting to happen.
- Knee over toes. "Never let the knee go past the toes" is a common cue. The joint can handle it, and the direction the knee points matters more than how far forward it goes.
- Locked knees. The claim that locking a hyperextended knee will slowly wear the joint down has little direct evidence. Keeping a soft bend is still good practice, because it keeps the muscles around the knee working.
- Headstand. Some teachers teach it to beginners in the first weeks. Others, including many physiotherapists, think the neck load is not worth the risk for most students. Both sides agree it needs to be taught step by step, never jumped into.
What everyone agrees on: go gradually, respect sharp pain, and do not force a joint where it does not want to go.
If you are new to yoga, the four-week Yoga for Beginners program teaches the basic postures one step at a time, in twenty-minute classes.
Frequently asked questions
What are the most common injuries in yoga?
Strains and sprains of the lower back, shoulders, wrists, knees and hamstrings. Neck injuries from headstand and shoulderstand are rarer but more serious. Most yoga injuries come from forcing range, loading a cold or weak joint, or going too fast.
Can yoga cause injuries?
Yes. Like any form of exercise, yoga can strain muscles and joints. Studies suggest the risk is similar to other moderate exercise and lower than in most sports. Most injuries come from pushing too far, too soon.
Who should not do yoga exercises?
Almost everyone can do some form of yoga, but some people need to adapt it and check with a doctor first: people with osteoporosis, uncontrolled high blood pressure, glaucoma, recent surgery or a recent injury, and pregnant women. They should avoid certain poses, such as deep twists, forward folds with a rounded spine or inversions, depending on the condition.
Is yoga bad for a torn meniscus?
Not in general, but some poses are. Deep knee bends with rotation, such as Lotus, Hero Pose and deep squats, can load the meniscus. Straight-leg poses, gentle strengthening and seated poses with support under the knees are usually fine. Ask your physiotherapist which positions to avoid while it recovers.
How do I know if I am pushing too hard in yoga?
Your breath gets short or you start breathing through the mouth, you shake so much that you lose the pose, or you feel sharp or pinching pain, especially in a joint. Any one of these means back off.
Should I do yoga with an injury?
It depends on the injury. Gentle movement often helps a strained muscle recover, but acute pain, swelling or a joint injury should be checked first. Tell your teacher, skip the poses that load the injured area, and choose a slower, gentler class until it settles.